Govato Documentation
Setup
Installation
Govato is currently accessible on Windows, with plans for iOS and Android versions in the pipeline. You can acquire it via the Microsoft Store (link).
Sign up
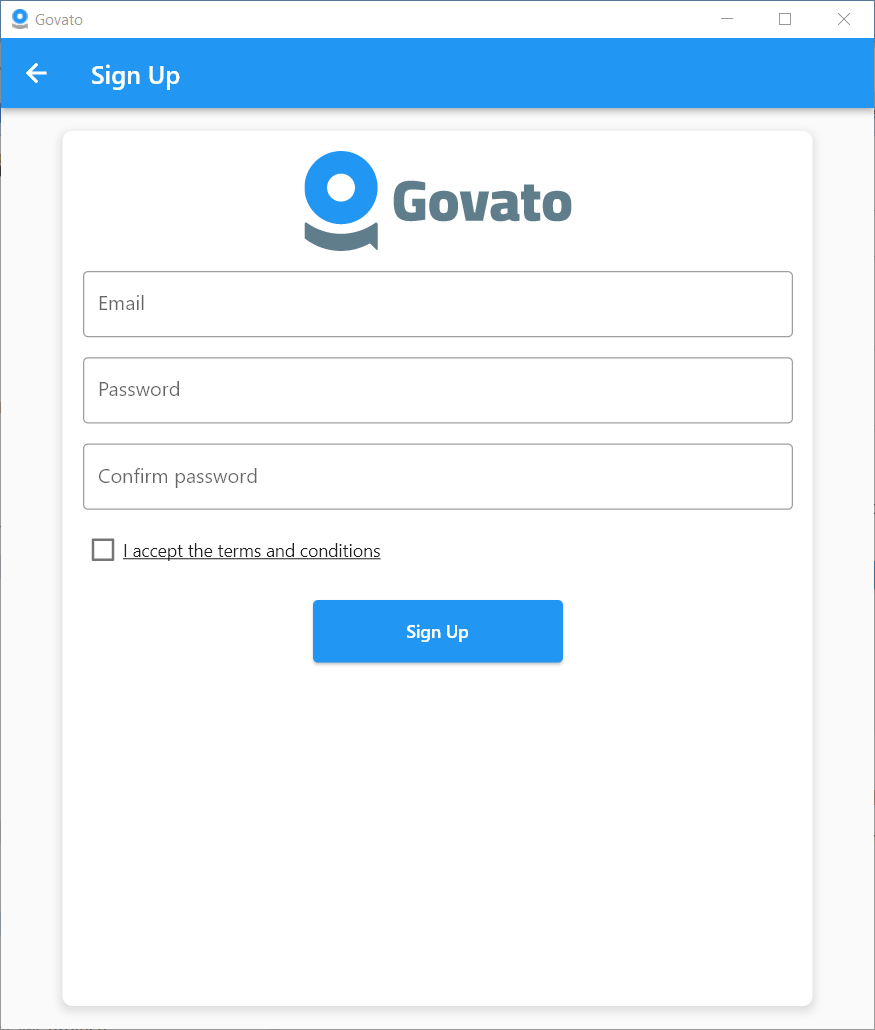
- Sign Up is Free: You won't be required to make any payments to set up an account; it's entirely free. You'll receive an initial credit to experiment with Govato.
- Enter Your Email: You need to provide your email address. This is usually the address where you receive emails.
- Choose a Password: You'll need to create a password. This password will be used to protect your account and should be something only you know.
- Accept Govato Terms and Conditions: You'll need to agree to follow these rules by checking the box.
- Click on Sign up: After you've entered your email, chosen a password, and agreed to the terms and conditions, you'll need to click a button that says "Sign Up." This tells the system you want to create an account.
- Verification Code: To make sure the email you provided is valid and that you are the owner of that email address, the service will send you a special code to your email. Sometimes, this email might end up in your spam folder, so be sure to check there if you can't find it in your regular inbox.
- Enter the Code: Once you've received the verification code in your email, you'll need to go back to the service's website or app and enter that code into a field they provide.
- Click Submit Button: After you've entered the code, you'll usually need to click a button that says "Submit" or something similar. This tells the system that you've successfully verified your email, and your account will be created.
That's it! After these steps, you should have successfully signed up for the service, and you can start using it with your new account.
Forgot password
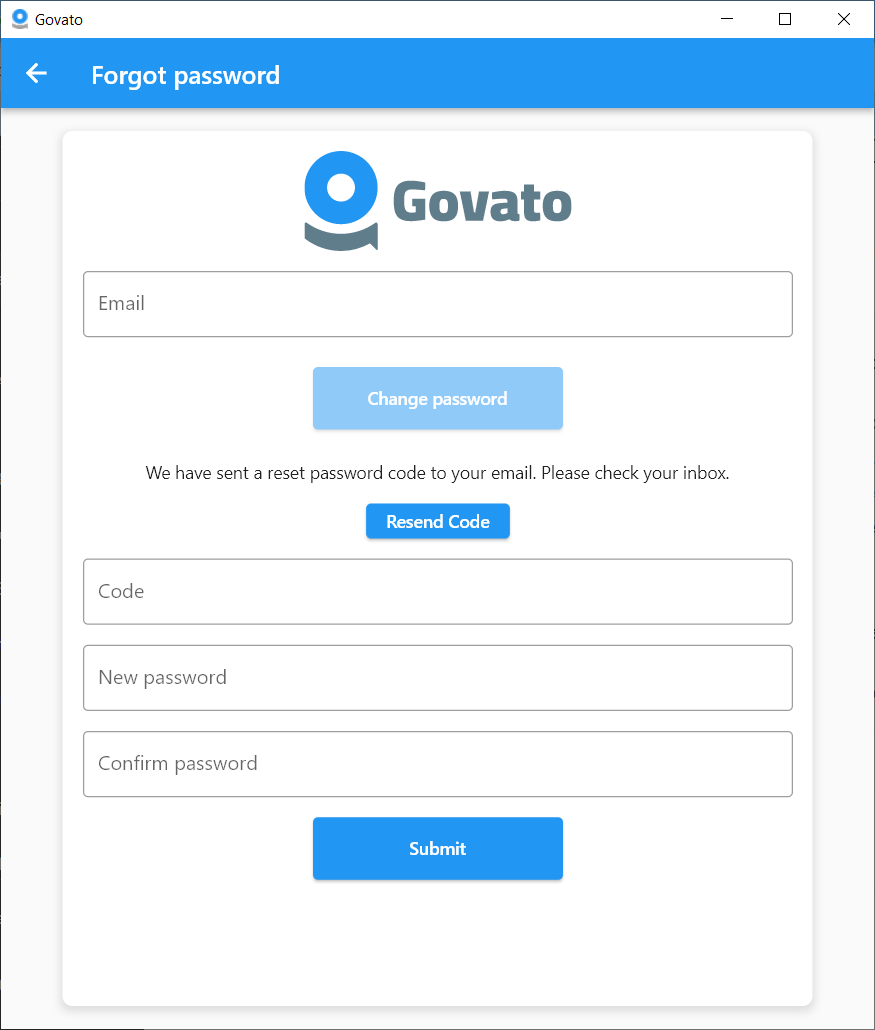
If you've misplaced your password, follow these steps as a user guide:
- Open the app, and you'll be directed to the sign-in page.
- Click on the "Forgot Password" option.
- Enter your email address and click the "Change Password" button.
- We'll send a verification code to your email address.
- Input that code in the "Code" field.
- Set your new password.
- Finally, click "Submit" to confirm the new password.
Remember, you have to choose a robust password that includes both uppercase and lowercase letters, numbers, and special characters for added security.
Delete account
To delete your account and data, follow these steps:
- Go to the "Settings" section.
- Navigate to the "Restricted Area" within the settings.
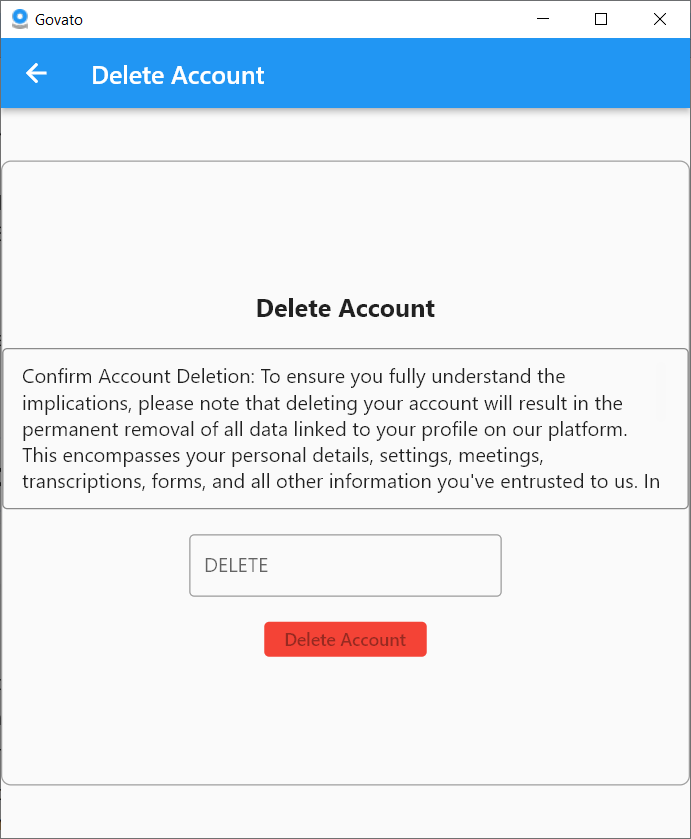
- Read the warning message carefully:
"Confirm Account Deletion: To ensure you fully understand the implications, please note that deleting your account will result in the permanent removal of all data linked to your profile on our platform. This encompasses your personal details, settings, meetings, transcriptions, forms, and all other information you've entrusted to us. In line with GDPR and other data protection regulations, this step reinforces our dedication to data privacy. Be aware that once you delete your account, it's irreversible and cannot be recovered. If you're certain you want to move forward, please type 'DELETE' to confirm. Make sure to save any essential data before confirming."
- Type 'DELETE' in all capital letters.
- Click on the 'Delete Account' button.
Please be aware that this action is irreversible, and all the data associated with your account will be permanently deleted. Make sure to save any important information before proceeding.
product
Meetings (homepage)
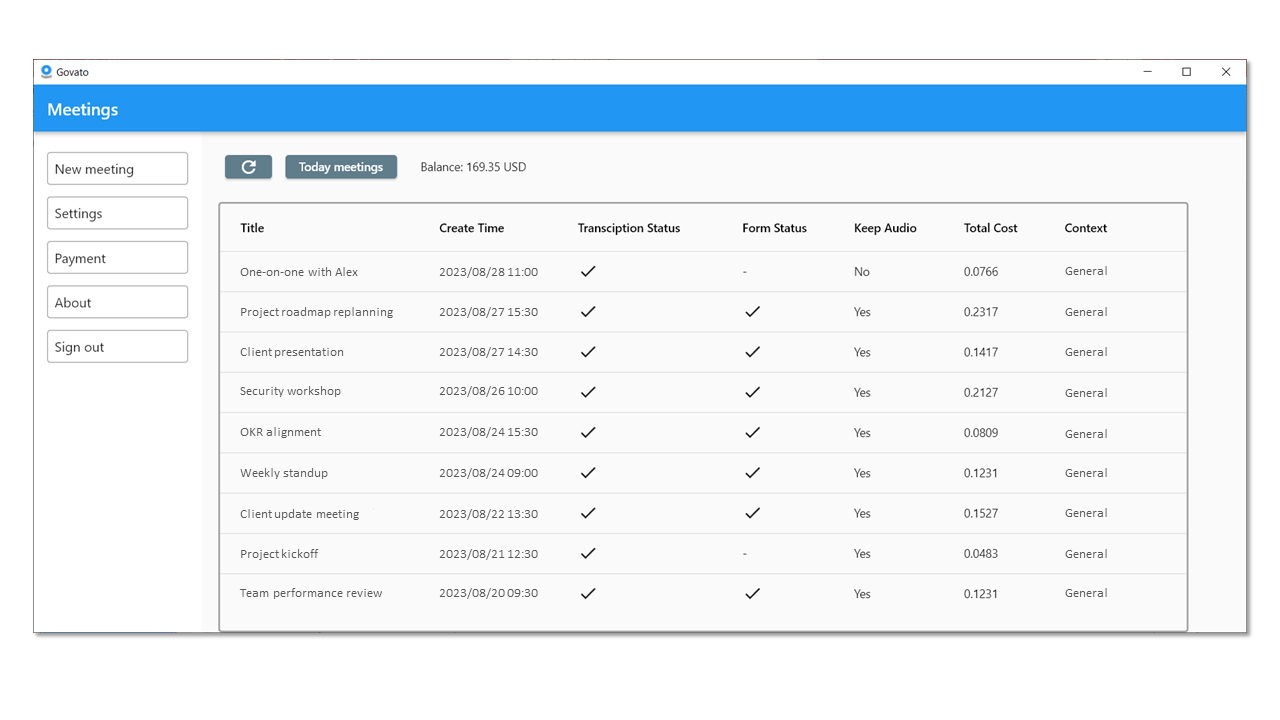
On the Meetings page, you will find a list of your recorded meetings, organized in a table format with different columns:
- Title: This column displays the title you selected for each meeting.
- Create Time: Here, you can see the date and time when you added each meeting to Govato.
- Transcription Status: This indicates whether the transcription process is ongoing, completed, or stopped due to issues.
- Form Status: This column shows whether form filling is in progress, completed, or encountered issues.
- Keep Audio: You can check this column to determine whether you've allowed Govato to retain the recorded or uploaded audio.
- Total Cost: In this column, you can view the total cost of transcription and form filling for each meeting in USD.
- Context: This column enables you to select the general context of the meeting and offers two options:
- General: Use this option for any general meeting, such as business meetings, etc.
- General Practitioner: Choose this option for meetings between a General Practitioner (GP) and a patient specifically aimed at filling related forms.
Create a new meeting
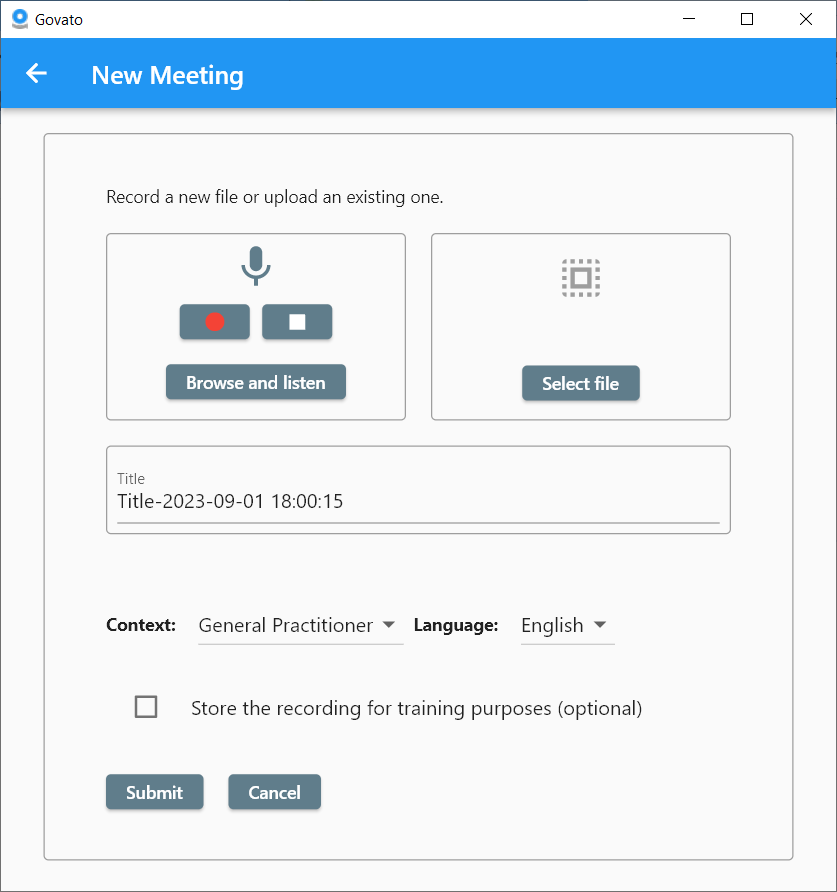
To initiate a new meeting, simply select the "New Meeting" button located in the sidebar of the Meetings page (homepage).
You can then proceed to either record your meeting or upload a previously recorded one. After that, you can provide a title, specify the meeting's context and language, and finally, submit all of that.
Step 1: Record or upload
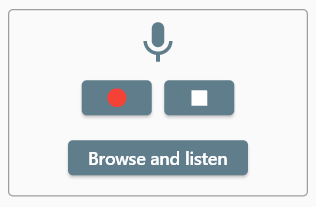
Record
- Press the "Start Recording" button to initiate the recording.
- Use the "Stop Recording" button to cease the recording.
- Click on the "Browse and Listen" button to access a list of recorded files and select the one you wish to review or choose from.
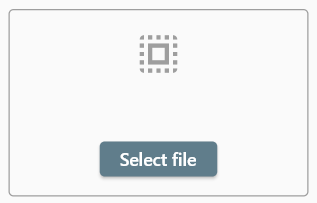
File Upload
- In this section, you have the option to explore your computer's storage and choose an audio file from a previously recorded meeting.
- Accepted audio file types include .mp3, .wav, .ogg, .aac, and .midi.
Step 2: Check the recording details and upload
- Choose a Title: You can give your meeting a custom title, or if you're okay with the default title, you can keep it as it is.
- Check Meeting Duration: Make sure to review the duration of your meeting to ensure everything is captured.
- Audio Playback: Play the audio to confirm that everything has been recorded correctly and in good quality.
- Upload: Once you're satisfied with the title, duration, and audio quality, click the "Upload" button to send the audio to our servers.
Step3: final settings
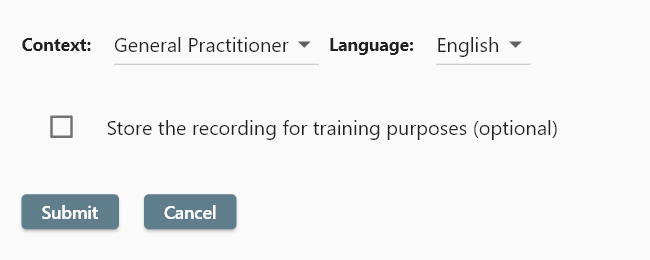
- Context: What is the purpose of your meeting? Is it a general gathering or a medical consultation? You can select "general practitioner" if it's a doctor-patient appointment or "general" for any typical business meeting.
- Language: Currently, we exclusively offer support for the English language. However, in the future, we plan to expand our language support to encompass more than 16 languages based on user demand.
- Store the recording checkbox: By checking this box, you grant permission for Govato to retain the uploaded audio, giving you access to it as well. If left unchecked, we will delete the original audio file after transcribing.
- Submit: Upon clicking the "Submit" button, your information will be sent, and you will be redirected to the home page. The transcription process will start immediately.
Meeting details
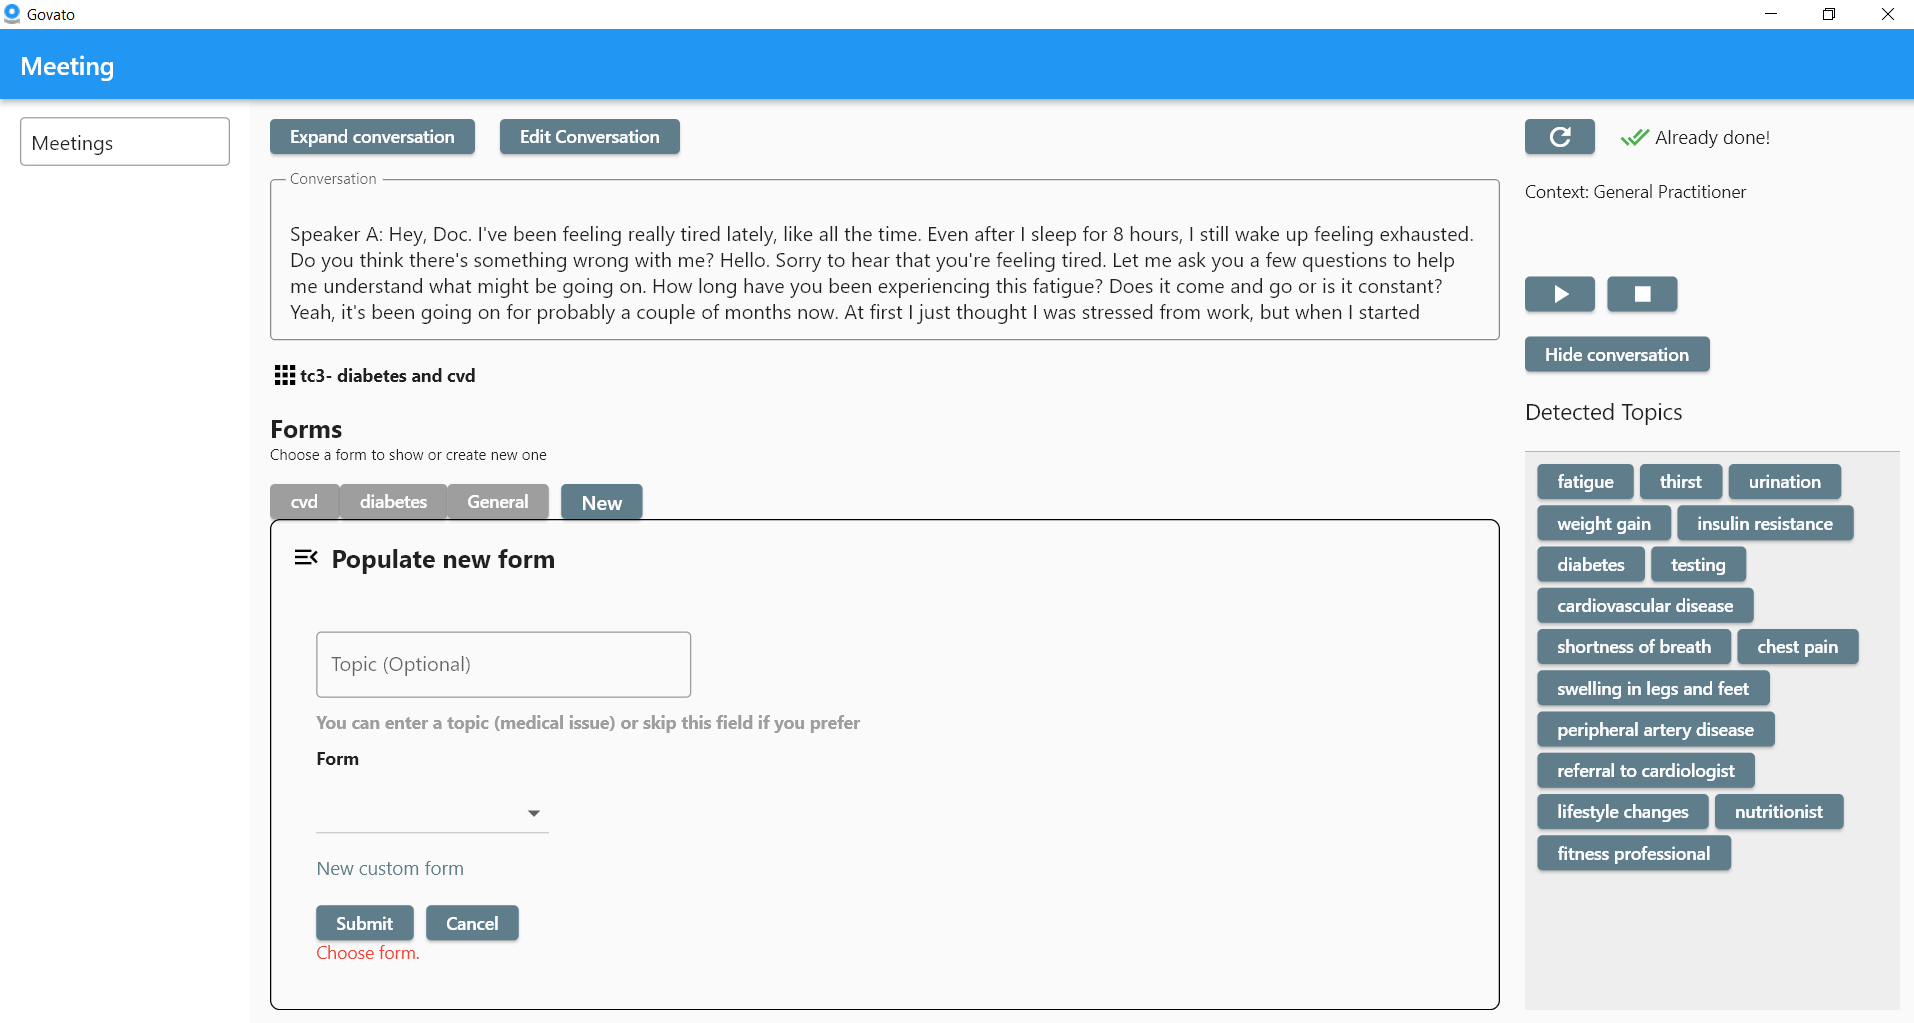
On the Meetings page (home page), you can select a specific meeting to take you to its dedicated details page, where you can access various features. Here, you can view the meeting's transcript, listen to the meeting's audio, choose a form to complete in relation to the meeting, and review any completed forms.
Part 1: Conversation
Here, you can decide if you want to see or hide the written conversation that's the transcription of the meeting.
You can also edit the conversation if you find any mistakes in it.
If you've given permission for Govato to keep the audio, you can click on the play button to listen to the meeting's sound.
Part 2: Fill out a form for a meeting
You have the option to select multiple forms to be filled out for a meeting. For instance, in a general practitioner context, when a doctor and patient discuss various topics, you can complete a separate GP form for each topic. Govato will assist you by identifying these topics and extracting them from the conversation.
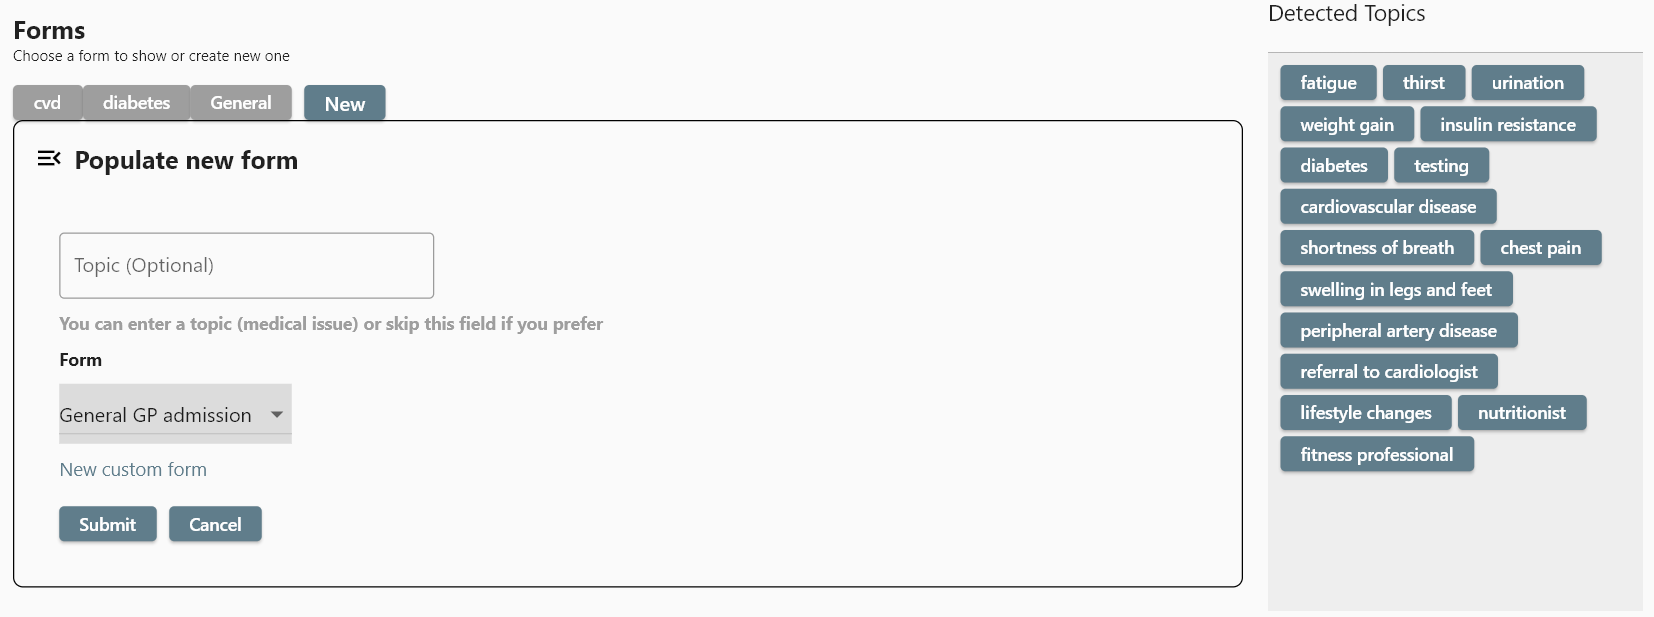
- Topic: Entering a topic is optional. If you've discussed multiple topics (medical issues), feel free to enter one here for a customized form response. Otherwise, leaving it blank is perfectly fine. You can also choose one of the topics identified by Govato AI on the right side of the screen.
- Select from: You can select either one of the pre-existing system forms or one of your personally customized forms.
- New custom form: To create a new custom form, simply click on this option, and you can design a personalized form for yourself. For additional details, click here.
Forms
In the "Forms" section of the main menu, you have the option to access all forms, generate new ones, or modify your existing forms. There are two distinct types of forms available:
1- System Forms: These forms are crafted by the Govato team and are accessible to all users
2- Your Forms: These are forms tailored to your specific requirements, exclusively accessible to you, with no external access.
Create a new form
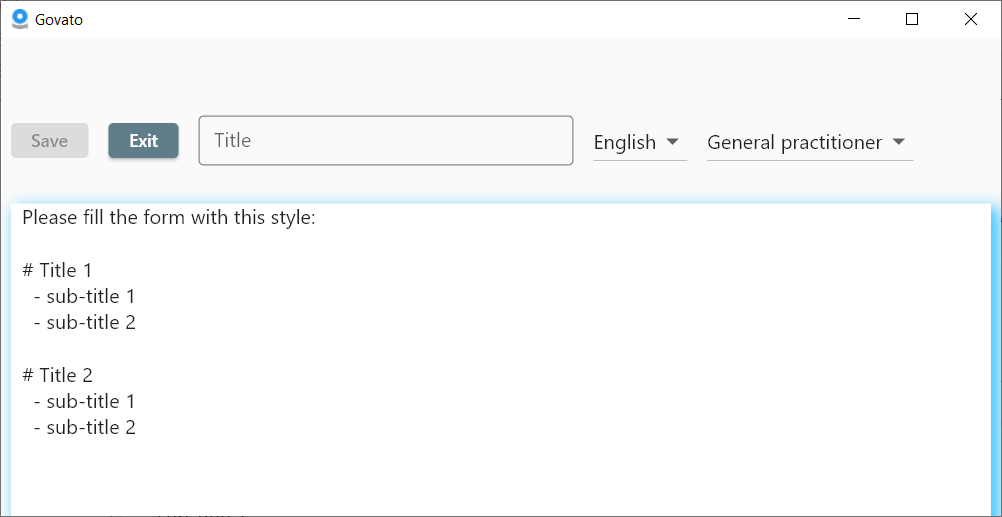
In the "Your Forms" section, you can make a special form that fits your specific needs by clicking on "New Form." Then, you can fill in your form using this particular structure:
# question- description item- description itemIn this format, the question is preceded by a hashtag (#), and each possible description item is listed beneath the question with a hyphen (-) before it.
Payment
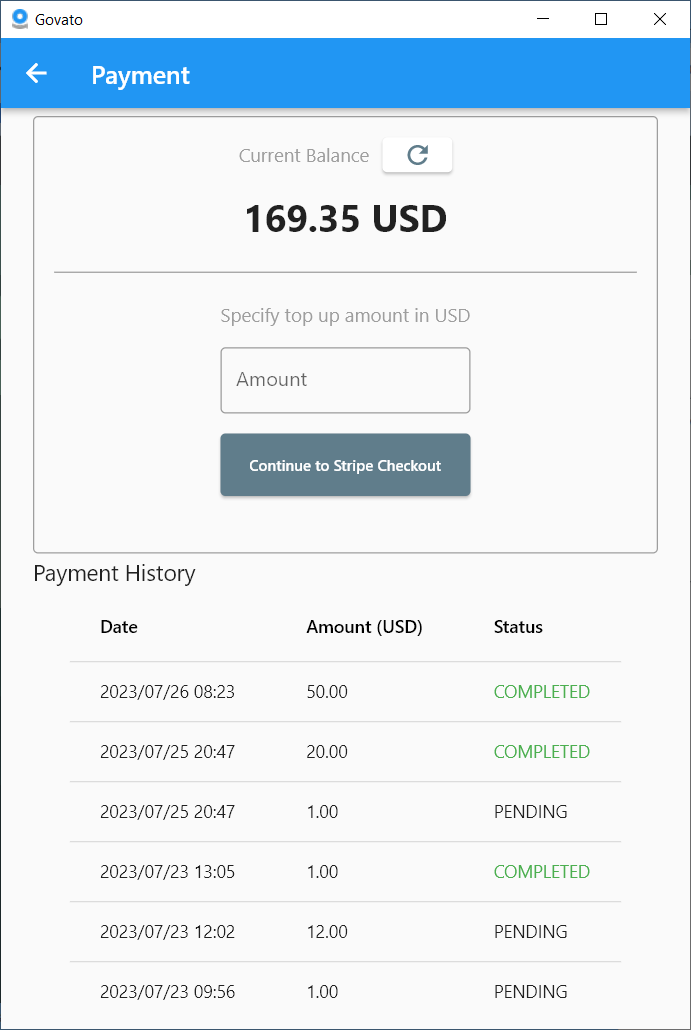
On the payment page, you'll find information about your current account balance. You can also input the specific amount in USD that you'd like to add to your balance. Simply click the "Continue to Stripe Checkout" button, and you'll be taken to the Stripe checkout platform. Stripe is a highly secure payment service trusted by many companies.
After successfully completing your payment through Stripe, return to the app and click the refresh icon located to the right of "your balance" to see the updated balance reflecting the amount you added.
At the bottom of the page, you'll find a section where you can view the complete history of all your payments.
